Sunday 18 October 2009

North East Area Group Meet - October 09

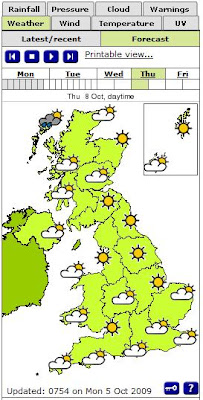
That time again, weather was not too bad and a good turnout - 5 cobs all 2 up:

In the foreground above is Ian H's recently aquired AK. Next to my car is Jimmy's MkII Sumo - nearly 20 years old and having had a fair bit of development including a 5 litre Rover Engine and bespoke fully adjustable suspension by magnum engineering. Here's some gratuitous photo's of the GD courtesy of Ian C who turned up to have a gander being on the verge of starting his Pilgrim Sumo build:
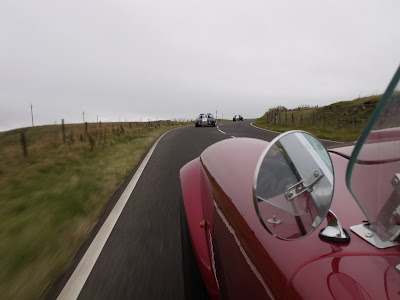
Ian's camera produces a nice red! Here we are departing from the Manor House Inn:
And here we are on the approach to Langley Castle:
Here's another classic action shot by Tommy - rding shotgun in John's Sumo - on the climb up to Hartside Summit:
When we arrived at the summit we ended up in the clouds - well it is 1904ft above sea level in October:
Thats Geoff's Dax in the foreground, and a particulalry rubbish view of Cumbria in the background.
As you can see below it was a bit dreary, and after a quick bite to eat it started to rain. Discretion being the better part of valour we promptly rany away back down to Alston and the Sunshine.
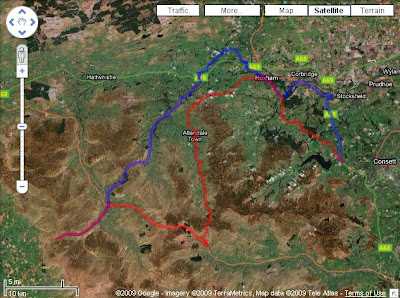
All in all a good 100 mile run out with pleny of interesting roads. As usual the map of the route is below which you can click on and be taken to the details on google maps.


The ride with the tweaked suspension and anti-roll bar was a marked improvement. I had Dave as a passenger (currently building a GD in Darlingotn) who had the misfortune(?) of a previous ride in the car when I was running it far too stiffly damped at the front. He felt that both the quality of ride and cornering was much improved.

I had also treated the windscreen to a coating of Rain-X both inside and out and am pleased to report that it did make seeing through the screen much easier than before and appeared to increase the effectiveness of the wipers by around 500%!

So, here's hoping for some decent weather in November....... might be pushing our luck this time.

Tuesday 13 October 2009

Bump Steer Measurements Again

Worked on this Last night and all of Today - 14 Hours in Total!! - It's a pain with the body on!

As before - time to break out the mirror, laser and graph paper:
Firstly I removed the spring and damper (and disconnecting the anti-roll bar). I then swapped some shims over on the top balljoint / wishbone to remove a bit of caster - this as you might expect made a mess of the bump steer effect.

To cut a very long story short - I moved the steering rack around in small increments (not easy with the body on and an accusump in the way) - moved the suspension through it's range and plotted the results. I then input these into the laptop to provide a record of the changes and try to figure out the next step:
I ended up with lots of results:

Conscious that Christmas was not that far way I settled on the best I could manage, repeated the exercise for the other side, then checked the first side. Here's an averaged set for both sides - (both sides were with a couple of minutes of each other):Despite my best efforts I could not reduce the effects to any less than this - nor could I achieve the ideal of some toe-in under bump). On my first graph when I first measured the bump steer - when i got confused with minutes and seconds! - I also got confused with toe-in and toe-out! - the slight toe-in under bump was in reality toe-out. All in all then not a good effort as it turns out. Ignoring the extremes of travel (where things tend to get excessive no matter what you do) the bump steer effects are generally less than 5 minutes - less than the 13 I had before!

Having adjusted the caster and rack height I nipped off down the local tyre centre to get the tracking re-set. On the way back I sought out some bumpy bits of road. I still noticed a slight effect on large bumps but it was much reduced from that previously not requiring any steering correction. On generally uneven / bumpy roads the car felt quite settled. Plotting graphs is one thing - it is how it feels when driving that is important. All in all a good improvement over the previous set up. The reduction in caster (2 x 1.0mm shims swapped) has reduced the steering effort a bit without affecting straight line stability.

I am now however - intrigued with the whole concept of steering geometry and bump steer. Over the winter I am going to see if it would be possible to eliminate it completely - probably not notice that much difference on the road - but that's not the point now!

Sunday 11 October 2009

Bumpsteer Revisited

So.... I have a small bumpsteer issue to resolve. On the 180 mile drive back from GD I paid particular attention to the characteristics that were being exhibited.


When encountering a "bump" the very slight pull on the steering feel wheel seemed to be associated with the extension phase of the damper as opposed to the compression phase. It is not really a significant effect - but you know what it's like once someone points something out to you and you can't help but keep noticing it!

I looked back at the graph I posted when I did the original measurements:

I also measured the "ride height"damper length and found it to be 12 inches. So if you look at the green line and assume a normal damper range of +/- 1 inch you can see I should be expecting a range of around 13 arc seconds change in toe per wheel - Now 13 arc seconds is pretty small - in fact t is 13 /3600's of a degree - so why do I appear to be getting some bumpsteer effect.

I'll tell you why.... 'cos after racking my brains I discovered I had cocked up my calculations - the scale for the green line should read arc minutes not arc seconds!!!

Now I ignored the effect because I thought 13 seconds was negligible - which it is. 13 minutes is not!! especially when you consider that I am running 10 minutes of total toe-in on the front!!

Bugger!

I was kind of led down this path of ignoring the effect as it was small due to the fact that I ran out of adjustment on the steering rack mounts. To get rid of the toe-out bumpsteer effect I needed to raise the rack - but I was at the end of the slotted holes - "it's only 13 seconds so I'll leave it"

Andy had recommended that I reduce the castor angle - this will also have the effect of lowering the front of the steering arm (i.e the same effect as raising the steering rack). So this should give me back the adjustment I had lost.

So the plan will be to "swap" one /some of the castor shims over from the front to the back and then get the mirror and laser out to re-check the bumpsteer effect and take it from there.

To avoid further cock-ups I have drawn out the laser and mirror method of measuring bumpsteer on AutoCad and have confirmed that it is a valid and accurate method.

Changing Castor angle and rack height will of course necessitate re-setting the front toe-in.

All in all a bit of an annoyance - but at least everything makes sense - the theory now matches up with the practical experience.

So if you end up running a lot of castor to get the steering to self centre for SVA/IVA don't be surprised if you can't get the adjustment to elliminate all the bumpsteer. You'll have to change it afterwards.

Thursday 8 October 2009

Trip to GD for Suspension Tweaks

The time had come to return to the GD Mothership and have the ant-roll bar fitted and the suspension tweaked. It was dark and 2 degrees C when I left at 7am! 120 miles later it was time for a coffee and some fried slices of pig in a bun to warm up:The journey was reasonably uneventful ending up at GD in the warm winter sunshine: After a bit of a chat with Andy we set to work fitting the anti-roll bar:It is a bit of a Chinese Puzzle fitting the anti-roll bar with the body on and necessitated removing the alternator to get it in. My advice would be to fit it before the body goes on. I originally didn't think I would need one - but once you get used to the levels of grip available you can't help but corner that bit faster and you'll soon find yourself needing one. And here's the man himself Andy Burrows hard at it:You can see the anti-roll bar in the following photo - it's the black bar running just aft of the chassis top brace:

It is held in place by two clamp blocks - one each side - which allow the bar to rotate but hold it in position as shown below - this also shows the retaining ring which butts against the inside of each block to fix the bar transversely:The anti-roll bar is connected to the lower shock mount by a rose jointed drop link:I knew I should have painted the track rod ends!! The lower end of the drop link is connected to the lower shock mounting bolt by a threaded extension:The extension piece is of a much larger diameter to provide a large bearing area onto the shock mounting bracket to accommodate the leverage forces. At the top the drop link is bolted directly to the arm of the anti-roll bar:At the moment the outer hole is being used. If the inner hole is used then this will increase the effective stiffness of the anti-roll bar by around 15%. You will need to grind away the return on the inner wing to provide clearance for the connecting bolt - you can just make this out in the photo.

After everything was put back together it was time for a test drive. After some rudimentary checks of wheel cambers Andy set the dampers to mid range and off we went. It was quite strange sitting on the "wrong" side of my car whilst someone else drove it.

What happened next can only really be described as astonishing. Andy drove the car much faster than I ever had (and probably ever will) although it never felt out of control. After a brief stop to twiddle with the dampers following slight front o/s lock up we continued at an increased pace. I am ashamed to admit that on more than one occasion I felt my right leg twitching for the "ghost" brake pedal on my side of the car!!

It certainly was an eye opener to see how fast a skilled driver could drive the car relying on the feedback he gained from the car. It was also comforting to be shown what the limits of your car are as it then gives you a yardstick to measure how close you are to (or far away from!!) them with your own driving.

The verdict upon our return was that it was now probably "95% there". Having had a quick blast myself I had noticed an improvement, particularly with respect to roll. Andy did say that I probably wouldn't notice a marked improvement as it wasn't "a million miles out" to start with.

Andy left me with a small list of things to do when I got back:

  1. Increase tyre pressures to 23 psi front and 22 psi rear - I had reduced the tyre pressures as a result of having overdamped the car - the overdamping was due to trying to control roll by damping as I did not have an anti-roll bar fitted.
  2. Check the bumpsteer as there was slight effect noticeable - You will remember from previous posts that I could not eliminate all the bumpsteer as I had run out of adjustment on the steering rack mounts.
  3. Reduce the Castor angle - this will reduce steering effort and will drop the height of the front of the steering arm - this should bring the steering rack back into the range of adjustment to eliminate all the bump steer. I had deliberately set a high castor angle to ensure self centering at SVA which can be a problem with new (stiff) steering components.
  4. Slightly increase the negative camber of the rear wheels to improve corner entry - a bit of a faff to do this one but Andy reckoned it wasn't desperate and would make a nice "winter job". I had set the rear cambers as per the build manual - but the final setting depends upon actual ride height/damping plus the feedback Andy got from driving the car.

All in all a good day and a fantastic experience having the man behind the car actually drive the one you've built. I was also quite pleased to hear that I had "screwed it together properly".

The drive back highlighted a car with a different character - It felt more compliant than before. It is interesting to note how drastically I had overdamped it. Originally I had the rear dampers on 9 clicks - they were now on 8 and I had the front dampers on 7 they were now on 4!! The car felt much more planted and less skittish - as you might expect from reducing the front damping. I also noticed the slight bumpsteer effect which I hadn't really noticed before - probably as I had artificially limited the front suspension travel by running too much damping.

So a few jobs to do. They will have to wait to next week as I'm away this weekend.

Oh...... and my new rocker cover gaskets did the job!

Tuesday 6 October 2009

New Rocker Cover Gaskets

Hats off to Real Steel.... New Gaskets turned up today - Guaranteed not to leak, blow out or suck in:

So, out with the old ones:
Hmmmmm.... doesn't look good - Looks like it has slipped over the edge of the head and then got crushed when tightening (possibly even over tightening?). Interesting how the entire cork gasket is impregnated with oil.
The new ones are rubber bonded onto a steel frame - so they keep their shape and fit where they are supposed to with no slipping out:

Piece of cake to fit compared to the cork variety - no flopping about etc. I'm feeling confident so fingers crossed.

Just need a few more routine checks and we are ready for the journey back to the mothership.

Monday 5 October 2009

Return to the Mothership

New (proper) gaskets ordered and I'm booked in at GD on Thursday for an anti-roll bar and suspension tweaks.


Thursday looks good for a 400 mile round trip:

Just hope me gaskets turn up before Wednesday night!

Saturday 3 October 2009

Another Day Another Suspension Tweak

Here we go again.........
At the last meet I found my recent suspension tweaks had resulted in a marginal deterioration. So I retraced my steps and then made some more tweaks with a few more short test drives along the same stretch of twisty road.

I am now at:

Front Dampers - 7 out of 12 clicks

Rear Dampers - 9 out of 12 clicks

Front Tyre Pressures - 21 psi

Rear Tyre Pressures - 20 psi

End result? an improvement over where it was before I had made it temporarily worse. Feels reasonably planted now.

There was however a little downside..... spotted a drop of oil on the floor! Turns out to be nothing more than the rocker gasket (again!).
After I changed them last time - looks like it was slightly displaced beyond the front of the head and has been pinched and ultimately broken.
Oh well - I'll get it right one day! It is a little tricky as the cork gaskets are smaller than the outer rim on the rocker covers so you sort of have to guess where they go - they also fall off / slide out of position if you don't silicone them to the covers.